
Example of embeddings and LoRA models over a base prompt to achieve a unique style in Automatic1111.

People have been asking me how to apply styles to already generated images and about my process of using embeddings, LoRA models, and custom checkpoints to get to the expressionist-nouveau painting style in stable diffusion.
All of the examples in this article are raw AI output and not cleaned up in Photoshop or other editing software so you can see what comes straight out of stable diffusion. Almost all images out of SD need you to spend some time inpainting / photoshopping / upscaling to get to print quality.
While this writeup isn’t exactly what people were inquiring about, this process might be helpful to get there.
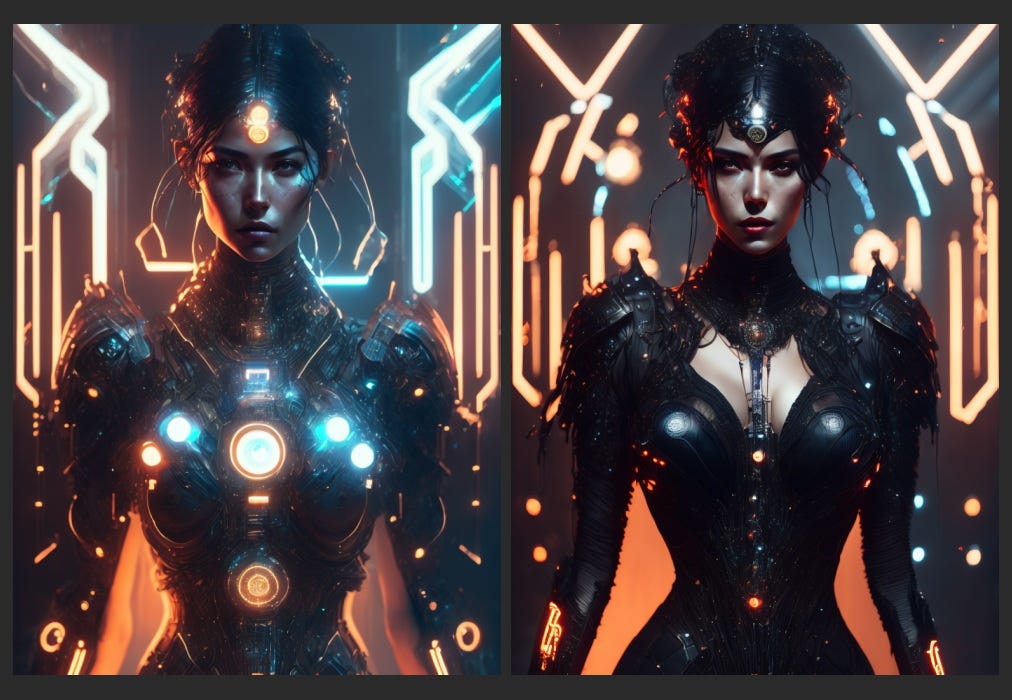
I'll give a fast overview of how I got to this quick example of the evolution of a base prompt (the robot below on the left) to the end result (the woman to the right) using additional drop in models without changing the prompt at all.

I'll use an 'off the rack' model, embedding and prompt to get to a starting point for this example, mostly to show the versatility of these drop in solutions for taking your image where you want it to go. First, the model. I used Artius 2.1 from SanchezVFX over on Civitai.
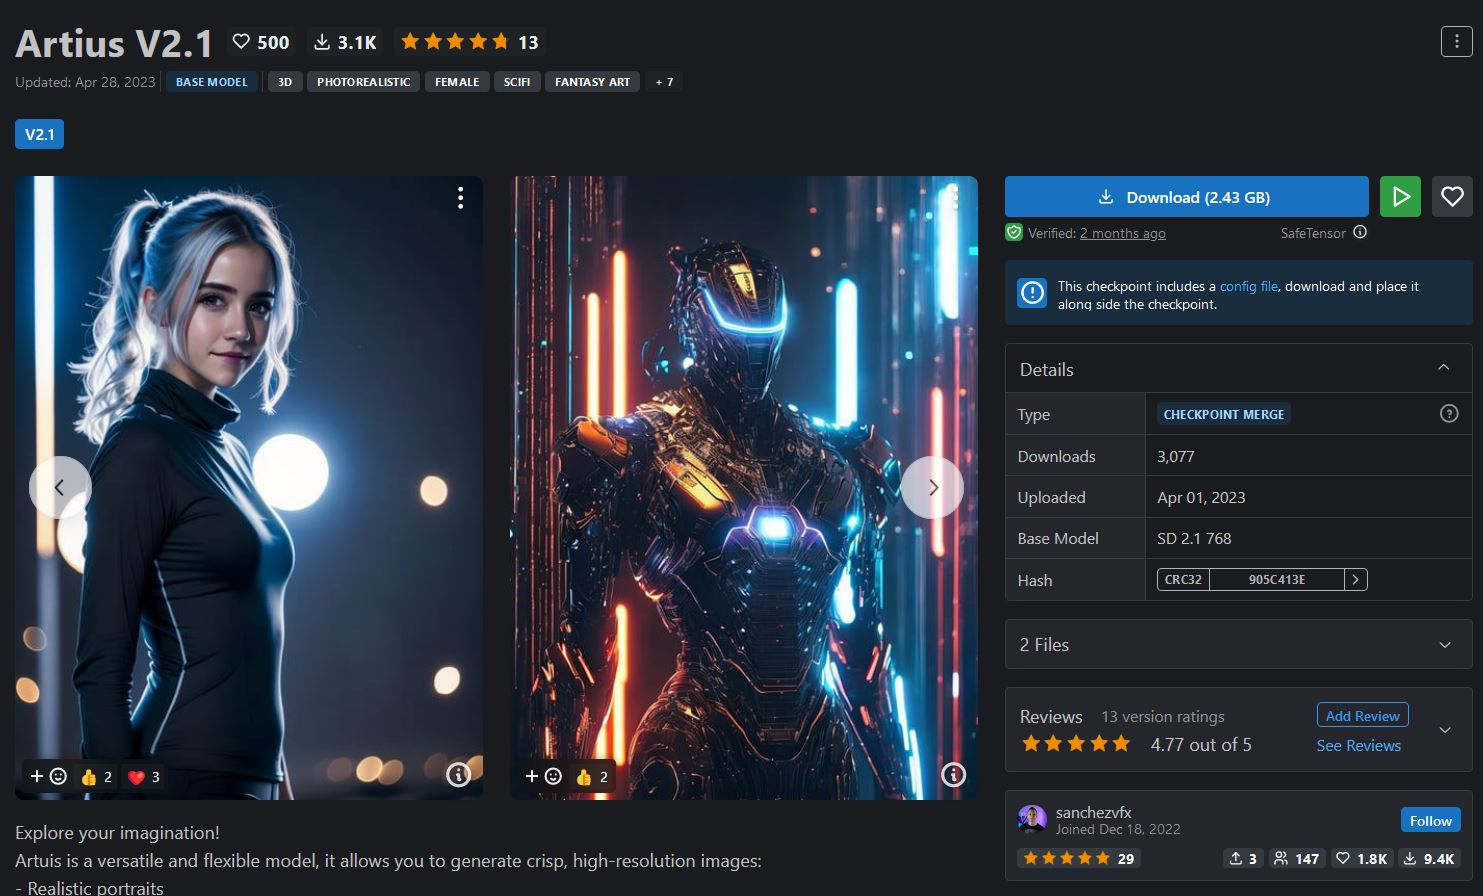
I'll use his prompt for that robotic image for this example.

From there, I wanted to use a mixture of the many LoRA I’ve made previously. One pair for content and another two for raw stylistic flow and loose brushwork. I won’t be going over the exact steps to how I made the LoRA in this article; I can write that up in a later one.
Many times, like this example, I use LoRA to get things closer to where I want instead of trying to figure out how to adjust the prompt to get there. Broad strokes with the base model and prompt, then fine tuning with the embeddings and LoRA.
The datasets for the first pair of LoRA were made using stable diffusion 1.5 , and trained with Koyha_ss. I generated 1000 or so images and picked the ‘best’ ones for the dataset. These two models are to change the subject, not the style.
A note about the images for the dataset: Since I do more surreal, expressionistic, stylized images, I tend not to care as much about 100% anatomical accuracy, and go for more general poses and overall composition / flow.
A few images from the dataset of the first LoRA:
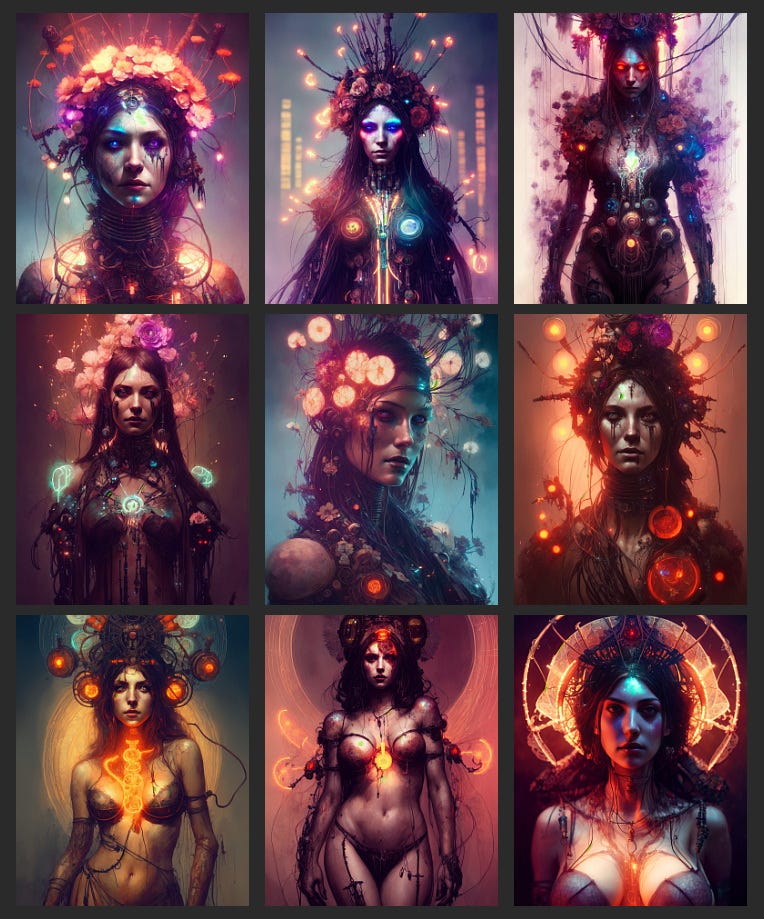
And part of the second LoRA’s dataset:

From here I added them to the XYZ grid script in Automatic1111 to make a graph with the axes being the strength of how weighted the models are. I hooked them up to auto1111, kept the exact same prompt, and chose one that had the look I was going for as well as maintaining coherence.
Some on the grid were pretty mangled or wasn’t the look I was aiming for, but there were a few that were acceptable, so I didn’t have to drill down further into the settings to fine tune the results even further. This is the one that I chose:
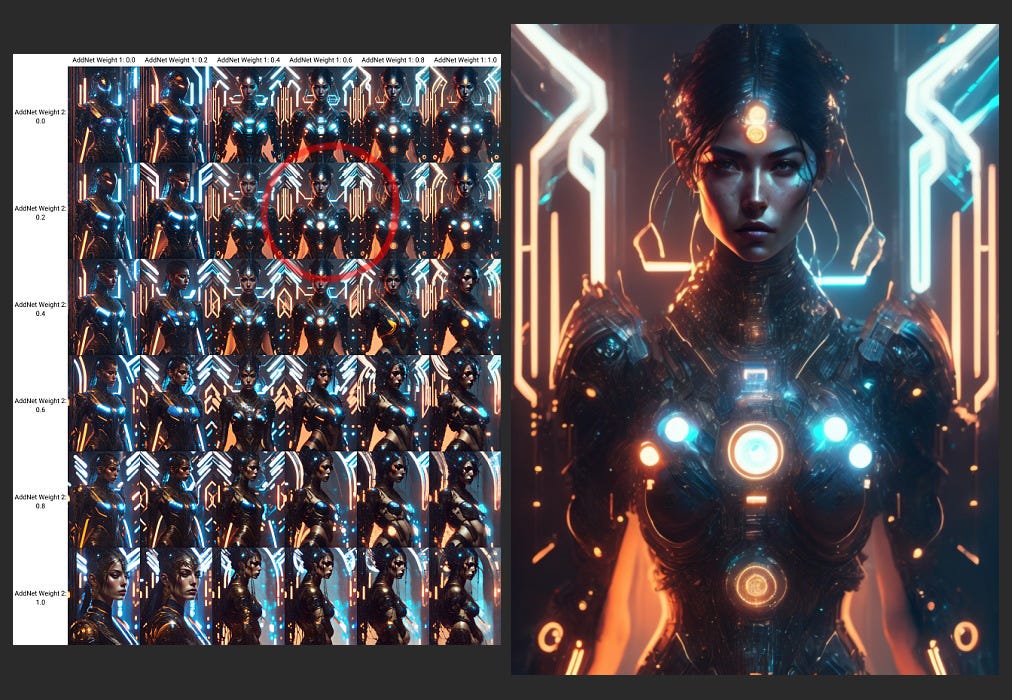
The results here were a bit bright and had a few more glowing bits on the suit than I wanted, so I went back on the hunt for an embedding to nudge the image a bit.
I tested out a few and ended up deciding on Widow Style 2.1 by theally also over on Civitai.
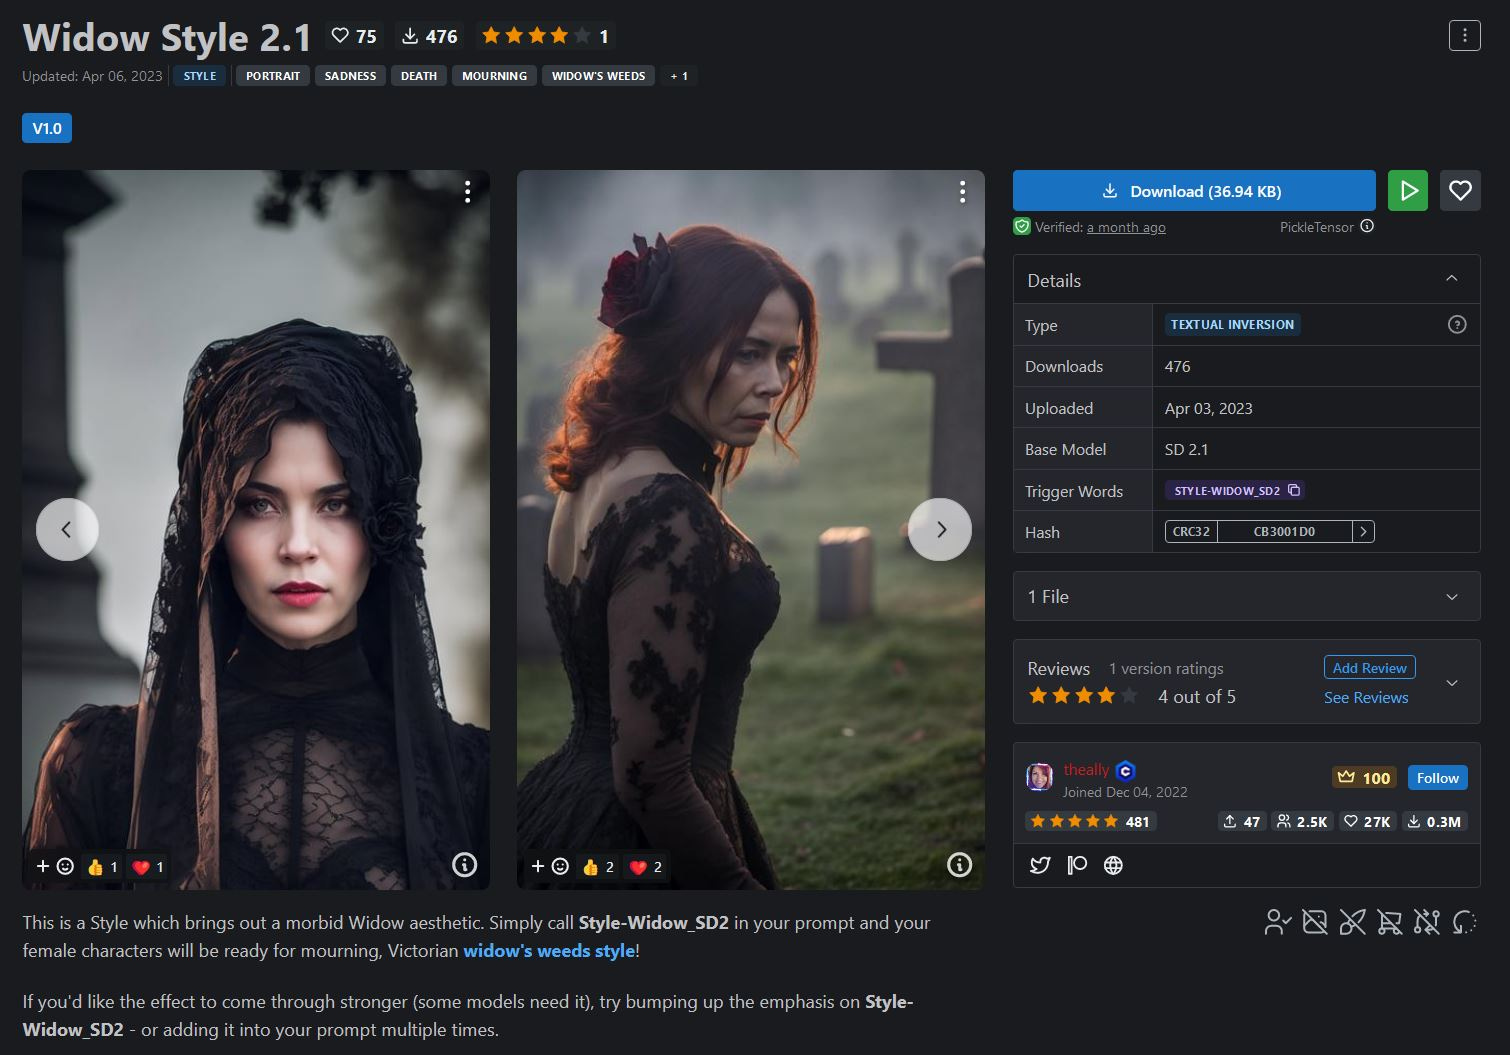
I simply appended the embedding’s trigger word to the end of the prompt. This had the effect I wanted. I didn’t try messing with the weighting of it because it was more than adequate for the purposes of this article.
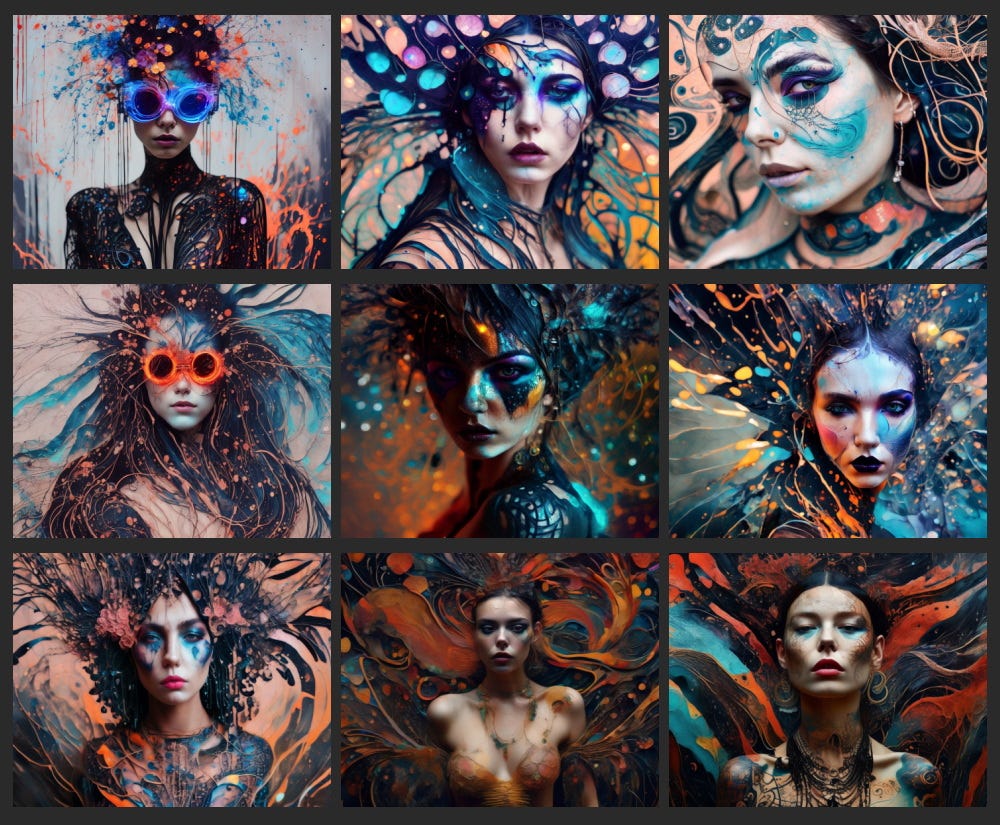
From here I wanted to add two more LoRA to implement the painterly style.
The dataset for these two models I made in stable diffusion 2.1 , and as with the previous models, I generated a few hundred, and chose about 30 that met my needs.
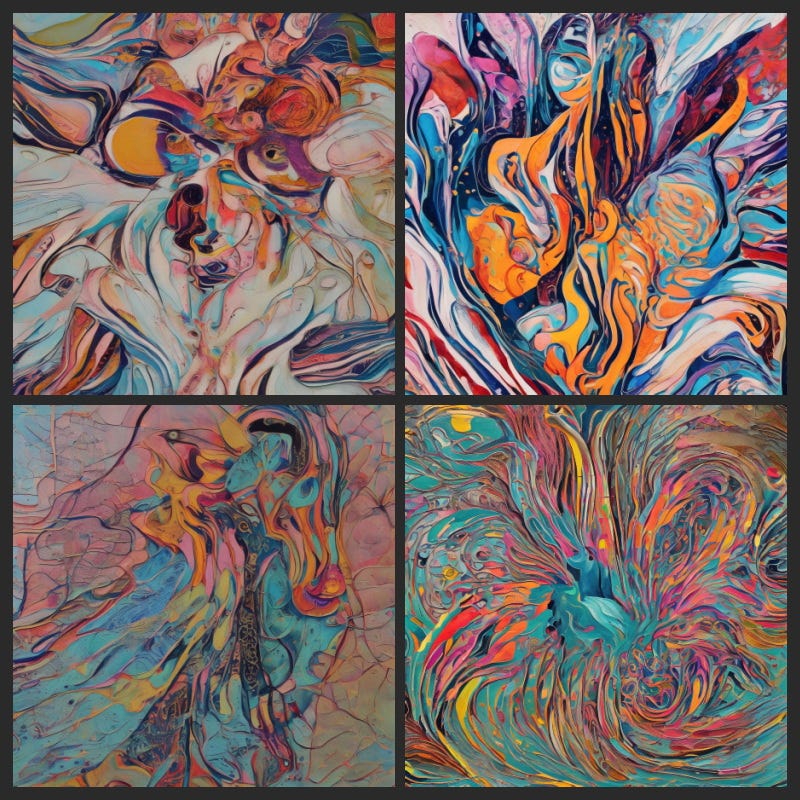
The first style LoRA is very high contrast, bold colors, heavily blocked, with sweeping smooth lines. Not much blending between the colors.

The dataset for the second LoRA has a much more tight and chaotic pattern, but no splatters, that mixes well with the bold one to give it a bit more detail.
So, as with the previous LoRA for the subject, I added these two for style, and generated another XY grid corresponding to the weight strength.
This grid had results from no change to being a jumble of paint in the bottom right corner. I chose the one that had the effect I wanted.
A few details were a bit off, so I nudged them with inpainting. This makes for less work in Photoshop later, but can also be used to really drastically change parts of the image.

There are more things you can to to keep poses and content more consistent like using controlnet, but I didn’t use it for this image.
From here the next step would be any touch ups / overpainting / color adjustments in Photoshop, then on to upscaling for printing.
I know there is a ton of detail that’s missing on exact settings and use of Automatic1111, but I intended this to be a rough overview of the process and to see one possible way to use LoRA and embeddings to get to your creative goals with stable diffusion.